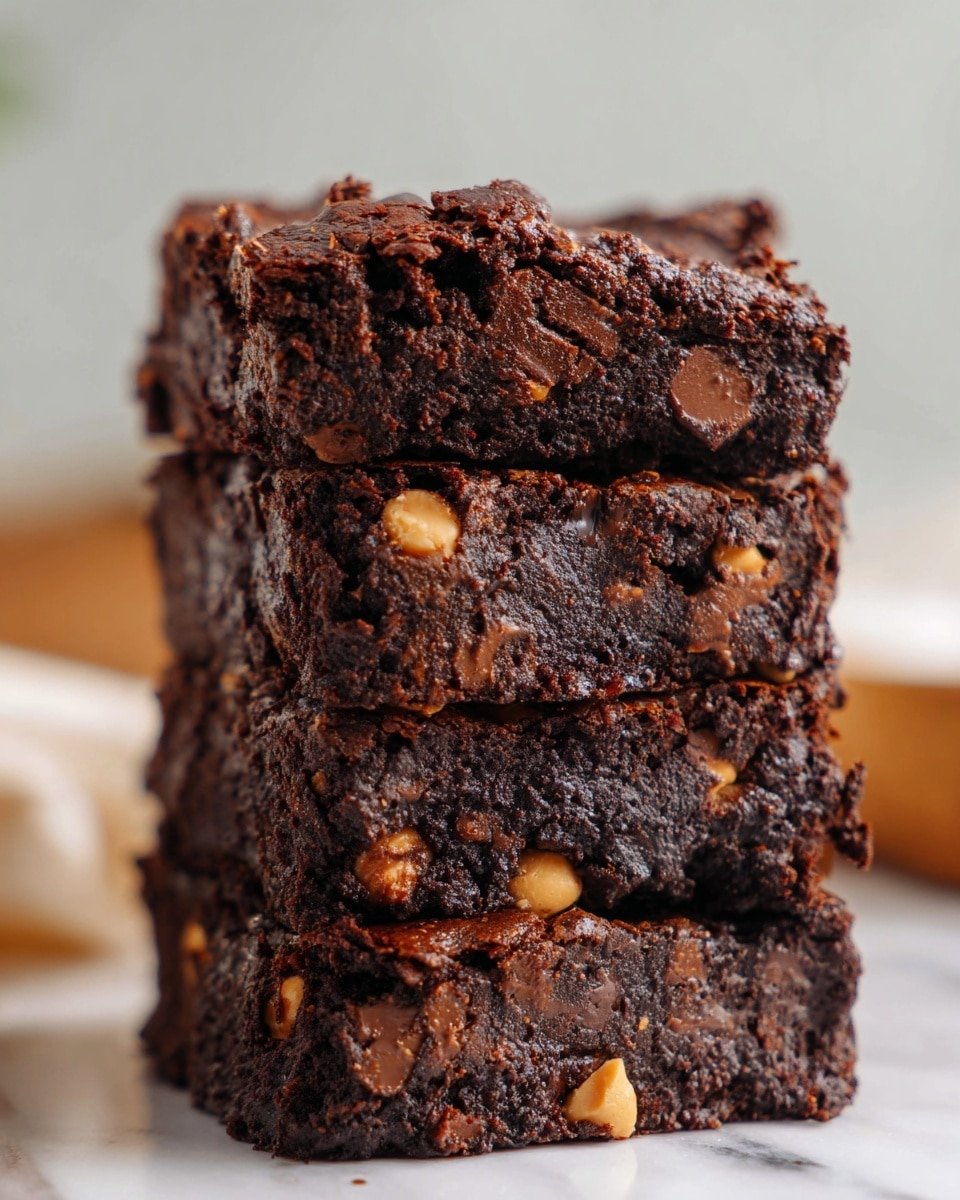
There’s just something impossibly comforting about a loaf of Chocolate Peanut Butter Chip Bread fresh out of the oven. I remember the first time I baked this for a casual weekend brunch — the aroma of rich cocoa mingling with sweet peanut butter wafting through the kitchen was unforgettable. My friends couldn’t stop asking for seconds and the leftovers disappeared within days. It’s one of those recipes that feels like a warm hug in bread form, perfect for sharing (or sneaking bites when no one’s looking!).
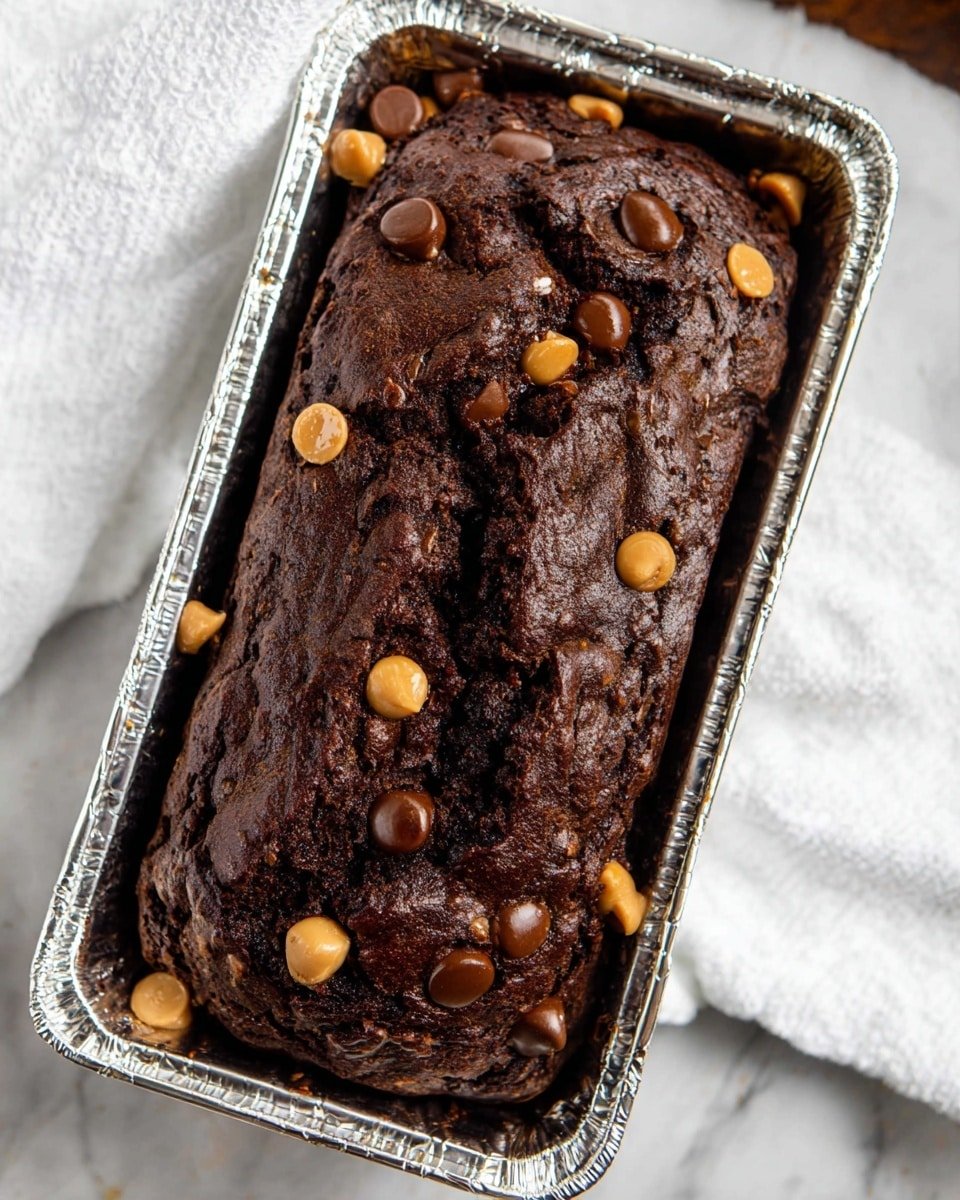
This Chocolate Peanut Butter Chip Bread Recipe stands out because it strikes a perfect balance between chocolatey depth and nutty sweetness. The tender crumb soaked with cocoa butter and studded with two kinds of chips creates an inviting texture that’s both soft and just a little bit chewy. From the first crackle of the foil off the loaf pan to that gorgeous dark loaf crust, every detail invites you in. Whether it’s a cozy fall afternoon or an anytime snack, the aroma, taste, and texture never disappoint.
Don’t worry if you’re a beginner baker—I promise this recipe is totally approachable. I’ll walk you through each step with practical tips to get your loaf just right the first time. By the end, you’ll have a gorgeous handcrafted treat that looks like it came from a bakery, but tastes all the more special because you made it yourself.
Why This Recipe Shines
- Flavor Harmony: The marriage of cocoa, peanut butter, and two chip varieties creates a rich, irresistible taste.
- Easy Assembly: Straightforward steps and common ingredients make it perfect for even novice bakers.
- Texture Play: Soft crumb with melty chips and a slight crust contrast delight every bite.
- Showstopper Finish: The loaf looks bakery-worthy—a perfect treat to impress friends or as a gift.
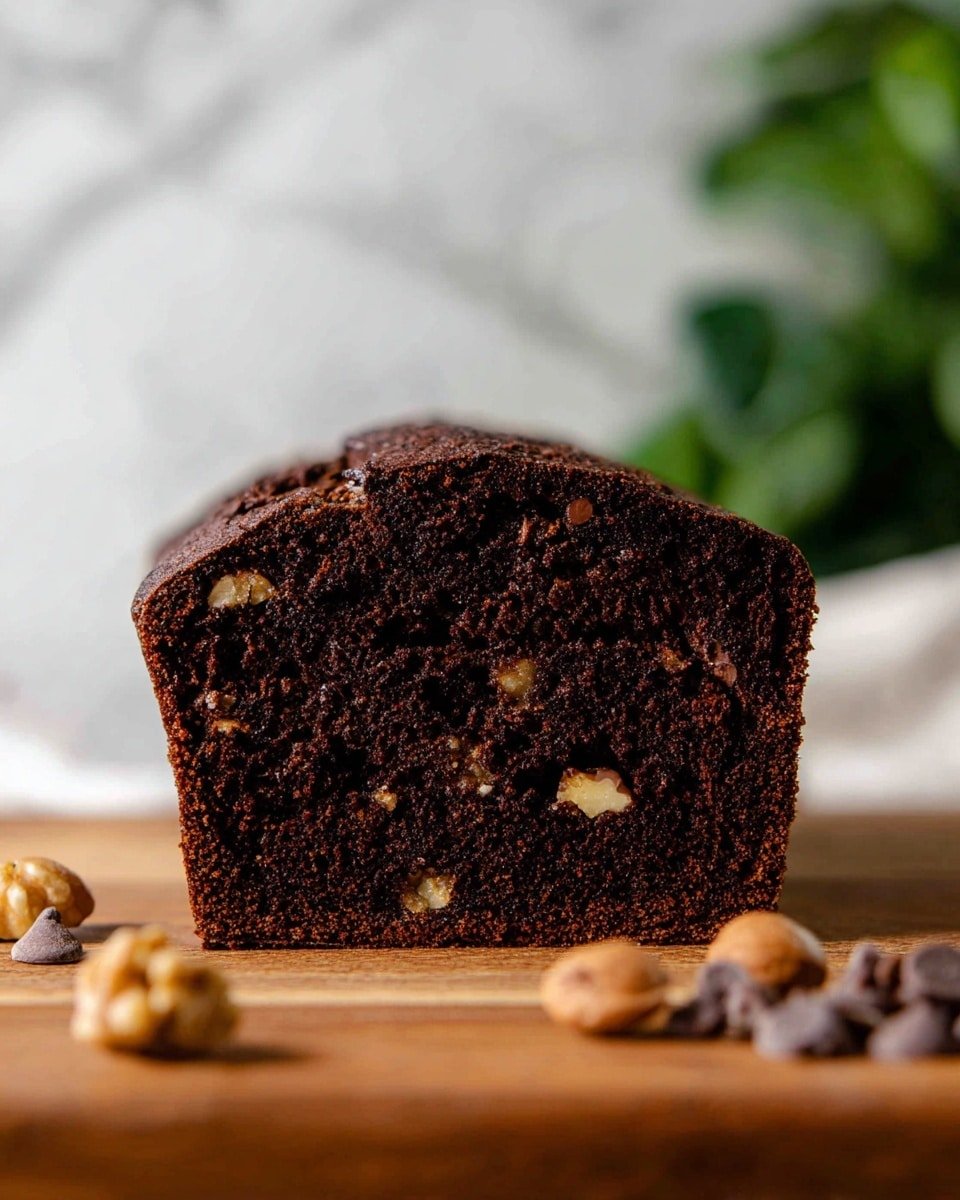
Ingredients You’ll Be Working With
Before you start, be sure to measure your ingredients carefully for best results. Use a spoon and level method for flour if possible. Exact amounts are conveniently listed in the recipe card at the bottom so you can bake along easily.
- All-purpose flour: Provides structure with a tender crumb; spoon and level for accuracy.
- Baking powder: Leavens the bread ensuring a nice rise; fresh powder is key.
- Salt: Enhances flavor and balances the sweetness perfectly.
- Unsalted butter: Adds richness; divided usage helps blend cocoa smoothly and creates tender batter.
- Unsweetened cocoa powder: Supplies deep chocolate flavor without extra sweetness.
- Sugar: Sweetens and contributes to moistness and browning.
- Eggs: Bind ingredients; room temperature eggs mix more evenly.
- Vanilla extract: Rounds out flavor; use pure for best aroma.
- Milk: Adds moisture and keeps the bread soft; dairy or plant-based both work fine.
- Semisweet chocolate chips: Delightful melty pockets of chocolate in every slice.
- Peanut butter chips: Provide sweet nuttiness that contrasts the cocoa.
If you don’t have peanut butter chips, chopped peanut butter candies or even chopped roasted peanuts can work as substitutes. For dairy-free, swap butter and milk with plant-based alternatives with similar fat content.
Chef’s Note
You’ll find the complete list of ingredients with exact measurements in the printable recipe card at the bottom of this post.
Tools You’ll Need
- 9×5 inch loaf pan: The perfect size for even baking and shaping your bread.
- Parchment paper: Prevents sticking and helps with easy removal.
- Mixing bowls: Separate bowls make mixing dry and wet ingredients easier to control.
- Electric mixer: Speeds up creaming butter and sugar for smooth batter.
- Measuring cups and spoons: Accuracy here improves texture and rise.
- Spatula: For gentle folding so chips don’t break.
- Microwave-safe bowl: For melting butter evenly without burning.
- Aluminum foil: Used to cover the bread so it bakes evenly without over-browning.
- Cooling rack: Helps the bread cool properly to avoid sogginess.
How to Make Chocolate Peanut Butter Chip Bread Recipe
Let’s get you started on creating this delicious Chocolate Peanut Butter Chip Bread! The steps are simple and mostly hands-off once you’ve combined your ingredients. I’ll guide you through prep, mixing, and baking, so your loaf turns out moist and full of flavor.
- Preheat and prep the pan: Set your oven to 350°F (175°C). Grease your 9×5 inch loaf pan thoroughly to prevent sticking, then line it with parchment paper and grease that too for easy release.
- Melt butter and mix cocoa: Melt 6 tablespoons of butter in a microwave-safe bowl using 30-second bursts until fully melted. Stir in the cocoa powder until smooth — this creates a rich chocolate butter base to fold into your batter.
- Combine dry ingredients: In a separate bowl, whisk together the flour, baking powder, and salt. This ensures even distribution of your leavening and seasoning.
- Cream butter and sugar: Using an electric mixer, beat the remaining 12 tablespoons of softened butter with the sugar until light and fluffy—this traps air for a tender texture.
- Add eggs and vanilla: Beat in the eggs one at a time, followed by the vanilla extract. Make sure each is fully incorporated before moving on.
- Mix in dry ingredients gradually: Add the flour mixture slowly into the wet batter to avoid overmixing, which can make the bread tough.
- Add milk: Stir in the milk gently until just combined. This keeps the batter moist and tender.
- Blend in the cocoa butter mixture: Pour the melted chocolate butter into the batter, mixing carefully until it’s fully incorporated for an even chocolate flavor and color.
- Fold in the chips: Gently fold in the semisweet chocolate chips and peanut butter chips, spreading them evenly without crushing.
- Bake covered: Pour the batter into the prepared pan and cover it with aluminum foil. Bake for 30 minutes—the foil traps moisture so the bread rises with a soft crust.
- Uncover and finish baking: Remove the foil and bake for an additional 30 minutes. The crust will firm up and deepen in color. Check doneness by inserting a toothpick in the center; it should come out with a few moist crumbs but no raw batter.
- Cool completely: Let the bread cool in the pan for about 15 minutes, then transfer to a wire rack to cool fully. This keeps the texture light and prevents sogginess.
Kitchen Wisdom
- Tip 1: Don’t skip greasing the parchment — it ensures your bread lifts out cleanly every time.
- Tip 2: Melt butter slowly to avoid scorching; melting cocoa into warm butter prevents lumps.
- Tip 3: Covering the bake prevents the crust from hardening too soon, keeping the crumb tender.
- Tip 4: Use a toothpick to test doneness—avoid overbaking which dries the loaf out.
How to Serve
Flavor Boosters
Once your Chocolate Peanut Butter Chip Bread is ready, consider adding a drizzle of honey or a dollop of peanut butter on warm slices to amplify the nutty sweetness. A sprinkle of sea salt or a light dusting of powdered sugar can add a charming finish. If you’re feeling indulgent, spread cream cheese mixed with a smidge of maple syrup for a creamy contrast.
Perfect Pairings
This bread pairs beautifully with a strong cup of coffee in the morning or a creamy hot chocolate on chilly evenings. For a lighter take, try it alongside a refreshing glass of cold milk or even a chilled latte. Snack time calls for it to shine on its own, but it also complements nutty or berry-flavored teas quite nicely.
Presentation Touches
Slice your loaf into even pieces for a crowd and serve on a rustic wooden board to highlight its artisanal charm. Wrapped up in wax paper tied with twine, individual slices make charming gifts or lunchbox treats. For brunch, serve slices with fresh fruit and a scattering of chopped nuts to elevate your spread.
Chocolate Peanut Butter Chip Bread Recipe Variations & Easy Swaps
- Use almond or cashew butter chips instead of peanut butter chips for a different nut flavor.
- Swap milk for oat or almond milk to keep it dairy-free without sacrificing moisture.
- Add a tablespoon of instant espresso powder with cocoa for a mocha twist.
- Mix in chopped walnuts or pecans for an added crunch.
- Use dark chocolate chips if you want a richer, less sweet chocolate flavor.
- Swirl in some peanut butter before baking for pockets of gooey nut butter.
Make-Ahead, Storage & Reheating
- Store baked bread in an airtight container at room temperature for up to 3 days without losing freshness.
- Refrigerate if keeping longer, up to one week, wrapped tightly to prevent drying out.
- For extended storage, freeze slices individually wrapped in plastic and foil for up to 3 months.
- Reheat slices in a toaster oven or microwave for about 20 seconds to warm through without drying.
FAQs
- Can I use natural peanut butter chips if I can’t find the sweetened ones?
Natural chips work but may change sweetness levels; you might want to add a bit more sugar or drizzle honey when serving. - Why do you cover the bread with foil for the first half of baking?
Covering traps steam which keeps the bread moist and allows it to rise without the crust getting too hard too soon. - Can I make this bread gluten-free?
Yes, try using a gluten-free all-purpose flour blend designed for baking. Texture might vary slightly but still delicious. - My bread sinks in the middle sometimes; what’s causing that?
That usually happens if the batter is overmixed or the oven temperature fluctuates—try to mix gently and avoid opening the oven too often. - Is it okay to substitute a loaf pan size?
A 9×5 inch pan is ideal; using a much larger or smaller pan will affect baking time and bread height.
Chocolate Peanut Butter Chip Bread Recipe
This rich and decadent Chocolate Peanut Butter Chip Bread combines the classic flavors of cocoa and peanut butter chips in a moist and tender loaf. Perfect for an indulgent snack or a dessert, this bread is easy to prepare and bakes to perfection with a luscious, chocolaty crumb studded with creamy peanut butter chips.
- Prep Time: 20 minutes
- Cook Time: 55 minutes
- Total Time: 1 hour 15 minutes
- Yield: 1 loaf
- Category: Breakfast
- Method: Baking
- Cuisine: American
Ingredients
Dry Ingredients
- 2 cups flour
- 2 teaspoons baking powder
- 1/4 teaspoon salt
- 8 tablespoons unsweetened cocoa powder
Wet Ingredients
- 18 tablespoons unsalted butter, softened and divided
- 1 1/3 cups sugar
- 2 large eggs
- 1 teaspoon vanilla extract
- 1/2 cup milk
Add-ins
- 1 cup semisweet chocolate chips
- 1 cup peanut butter chips
Instructions
- Preheat Oven: Preheat your oven to 350 degrees Fahrenheit to prepare for baking the bread.
- Prepare Pan: Grease a 9 inch by 5 inch loaf pan thoroughly, then line it with parchment paper and grease the parchment paper as well to ensure easy removal.
- Melt Butter and Mix Cocoa: Melt 6 tablespoons of the unsalted butter in the microwave in 30 second increments until fully melted. Stir in the unsweetened cocoa powder until well combined to create the cocoa butter mixture.
- Mix Dry Ingredients: In a separate bowl, whisk together the flour, baking powder, and salt to evenly distribute the leavening and seasoning.
- Cream Butter and Sugar: Using a mixer, cream the remaining 12 tablespoons of softened butter with the sugar until light and fluffy for a well-aerated batter.
- Add Eggs and Vanilla: Beat in the eggs one at a time and then add the vanilla extract, mixing well to incorporate fully.
- Combine Flour Mixture: Gradually add the dry flour mixture to the wet ingredients, mixing until just combined to avoid overworking the batter.
- Add Milk: Pour the milk into the batter and gently mix until it is fully incorporated for a smooth consistency.
- Incorporate Cocoa Butter Mixture: Stir the melted butter and cocoa powder mixture into the batter until it is fully combined and evenly colored.
- Add Chocolate and Peanut Butter Chips: Gently fold in the semisweet chocolate chips and peanut butter chips to distribute them evenly throughout the batter.
- Fill Pan and Bake Covered: Pour the batter into the prepared loaf pan and cover the pan tightly with aluminum foil. Bake in the preheated oven for 30 minutes to allow the bread to set.
- Uncover and Continue Baking: Remove the aluminum foil and bake for an additional 30 minutes to develop a firm crust and ensure it is fully baked through.
- Cool and Remove: Allow the bread to cool completely before removing it from the loaf pan to maintain its structure and prevent breaking.
Notes
- Make sure the butter used in the batter is softened to room temperature for better mixing and texture.
- Use parchment paper to prevent sticking and make cleanup easier.
- Keep the loaf pan covered with foil during the first half of baking to retain moisture and then uncover to brown the crust nicely.
- Check doneness by inserting a toothpick into the center; it should come out with a few moist crumbs but no raw batter.
- For added flavor, try adding chopped peanuts or a swirl of peanut butter before baking.

